Vue中使用wangEditor3

安装

通过npm安装:

1
npm install wangeditor

创建实例

基本用法:

1
2
3
4
5
6
7
8
9
10
11
12
13
14
15
16
17
18
19
20
21
<template>
<div>
<div id="editor" class="editor"></div>
</div>
</template>

<script>
//导入wangEditor
import E from 'wangeditor'
export default {
name: 'editor',
mounted () {
var editor = new E('#editor')
editor.customConfig.onchange = (html) => {
this.formArticle.content = html
}
//创建编辑器实例
editor.create()
}
}
</script>

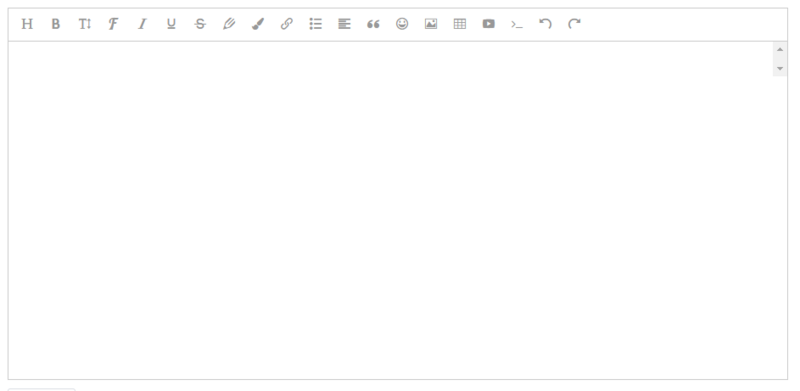
简单的富文本编辑器实例

将菜单与编辑器主体分离:

1
2
3
4
5
6
7
8
9
10
11
12
13
14
15
16
17
18
19
20
21
22
23
24
25
26
27
28
29
30
31
32
<template>
<div>
<div id="editorMenu" class="editorMenu"></div>
<div id="editor" class="editor"></div>
</div>
</template>

<script>
import E from 'wangeditor'
export default {
name: 'editor',
mounted () {
var editor = new E('#editorMenu', '#editor')// 两个参数也可以传入 elem 对象,class 选择器
editor.customConfig.onchange = (html) => {
this.formArticle.content = html
}
editor.create()
}
}
</script>

<style scoped>
.editorMenu {
border: 1px solid #ccc;
}
.editor {
margin-top: -1px;//将多出来的一像素边框隐藏
border: 1px solid #ccc;
min-height: 400px;//编辑框最小高度
height:auto;//编辑框高度超过最小高度会根据内容高度自适应
}
</style>

菜单与主体分离的编辑器

上传本地图片tab配置/隐藏网络图片tab配置:

1
2
3
4
5
6
// 下面两个配置,使用其中一个即可显示“上传图片”的tab。但是两者不要同时使用!!!
editor.customConfig.uploadImgShowBase64 = true // 使用 base64 保存图片
editor.customConfig.uploadImgServer = '/upload' // 上传图片到服务器

// 隐藏“网络图片”tab
editor.customConfig.showLinkImg = false

上传图片tab

网络图片tab

上传图片到服务器配置:

1
2
3
4
5
6
7
8
9
10
11
12
13
14
15
16
17
18
19
20
21
22
23
24
25
26
27
28
29
30
31
32
33
34
35
36
37
38
39
40
41
42
43
44
45
46
47
48
49
50
51
52
53
54
55
56
57
58
59
60
61
62
63
64
65
66
67
68
69
// 配置服务器端地址
editor.customConfig.uploadImgServer = '服务器接口地址'
//自定义filename
editor.customConfig.uploadFileName = 'file'
//自定义上传参数
editor.customConfig.uploadImgHeaders = {
'Accept' :'*/*',
'Blade-Auth':xxxx
}
// 将图片大小限制为 3M
editor.customConfig.uploadImgMaxSize = 3 * 1024 * 1024
// 限制一次最多上传 5 张图片
editor.customConfig.uploadImgMaxLength = 5


//使用监听函数处理上传图片的不同阶段
editor.customConfig.uploadImgHooks = {
before: function (xhr, editor, files) {
// 图片上传之前触发
// xhr 是 XMLHttpRequst 对象,editor 是编辑器对象,files 是选择的图片文件
// 如果返回的结果是 {prevent: true, msg: 'xxxx'} 则表示用户放弃上传
// return {
// prevent: true,
// msg: '放弃上传'
// }
},
success: function (xhr, editor, result) {
// 图片上传并返回结果,图片插入成功之后触发
// xhr 是 XMLHttpRequst 对象,editor 是编辑器对象,result 是服务器端返回的结果
},
fail: function (xhr, editor, result) {
// 图片上传并返回结果,但图片插入错误时触发
// xhr 是 XMLHttpRequst 对象,editor 是编辑器对象,result 是服务器端返回的结果
},
error: function (xhr, editor) {
// 图片上传出错时触发
// xhr 是 XMLHttpRequst 对象,editor 是编辑器对象
},
timeout: function (xhr, editor) {
// 图片上传超时时触发
// xhr 是 XMLHttpRequst 对象,editor 是编辑器对象
},
// 如果服务器端返回的不是 {errno:0, data: [...]} 这种格式,可使用该配置
// (但是,服务器端返回的必须是一个 JSON 格式字符串!!!否则会报错)
customInsert: function (insertImg, result, editor) {
// 图片上传并返回结果,自定义插入图片的事件(而不是编辑器自动插入图片!!!)
// insertImg 是插入图片的函数,editor 是编辑器对象,result 是服务器端返回的结果
// 举例:假如上传图片成功后,服务器端返回的是 {url:'....'} 这种格式,即可这样插入图片:
var url = result.url
insertImg(url)
// result 必须是一个 JSON 格式字符串!!!否则报错
}
}


//自定义上传图片错误时的提示效果(默认为alert弹窗)
editor.customConfig.customAlert = function (info) {
// info 是需要提示的内容
alert('自定义提示:' + info)
}


//完全控制上传图片过程
editor.customConfig.customUploadImg = function (files, insert) {
// files 是 input 中选中的文件列表
// insert 是获取图片 url 后,插入到编辑器的方法
// 上传代码返回结果之后,将图片插入到编辑器中
insert(imgUrl)
}

更多配置请参考wangEditor3官方文档:

https://www.kancloud.cn/wangfupeng/wangeditor3/332599

将wangEditor作为组件使用:

子组件:

1
2
3
4
5
6
7
8
9
10
11
12
13
14
15
16
17
18
19
20
21
22
23
24
25
26
27
28
29
30
31
32
33
34
35
36
37
38
39
40
41
42
43
44
45
46
47
48
49
50
51
52
53
54
55
56
57
58
59
60
61
62
63
64
65
66
67
68
69
70
71
72
73
74
75
76
77
78
79
80
81
82
83
84
85
86
87
88
89
90
91
92
93
94
95
<template>
<div id="wangeditor">
<div ref="editorElem" style="text-align:left"></div>
</div>
</template>

<script>
import E from 'wangeditor'
export default {
name: 'editorElem',
data () {
return {
editorContent: '',
}
},
props:['catchData'], //接收父组件的方法
mounted() {
var editor = new E(this.$refs.editorElem) //创建富文本实例
editor.customConfig.onchange = (html) => {
this.editorContent = html
this.catchData(html) //把这个html通过catchData的方法传入父组件
}
editor.customConfig.uploadImgServer = '你的上传图片的接口'
editor.customConfig.uploadFileName = '你自定义的文件名'
editor.customConfig.uploadImgHeaders = {
'Accept': '*/*',
'Authorization':'Bearer ' + token //头部token
}
//wangEditor3中菜单栏无法换行显示,如菜单项内容超出则需要对菜单项进行删减
editor.customConfig.menus = [ //菜单配置
'head', // 标题
'bold', // 粗体
'fontSize', // 字号
'fontName', // 字体
'italic', // 斜体
'underline', // 下划线
'strikeThrough', // 删除线
'foreColor', // 文字颜色
'backColor', // 背景颜色
'link', // 插入链接
'list', // 列表
'justify', // 对齐方式
'quote', // 引用
'emoticon', // 表情
'image', // 插入图片
'table', // 表格
'video', // 插入视频
'code', // 插入代码
'undo', // 撤销
'redo' // 重复
]
//下面是最重要的的方法
editor.customConfig.uploadImgHooks = {
before: function (xhr, editor, files) {
// 图片上传之前触发
// xhr 是 XMLHttpRequst 对象,editor 是编辑器对象,files 是选择的图片文件
// 如果返回的结果是 {prevent: true, msg: 'xxxx'} 则表示用户放弃上传
// return {
// prevent: true,
// msg: '放弃上传'
// }
},
success: function (xhr, editor, result) {
// 图片上传并返回结果,图片插入成功之后触发
// xhr 是 XMLHttpRequst 对象,editor 是编辑器对象,result 是服务器端返回的结果
this.imgUrl=Object.values(result.data).toString()
},
fail: function (xhr, editor, result) {
// 图片上传并返回结果,但图片插入错误时触发
// xhr 是 XMLHttpRequst 对象,editor 是编辑器对象,result 是服务器端返回的结果
},
error: function (xhr, editor) {
// 图片上传出错时触发
// xhr 是 XMLHttpRequst 对象,editor 是编辑器对象
},
timeout: function (xhr, editor) {
// 图片上传超时时触发
// xhr 是 XMLHttpRequst 对象,editor 是编辑器对象
},
// 如果服务器端返回的不是 {errno:0, data: [...]} 这种格式,可使用该配置
// (但是,服务器端返回的必须是一个 JSON 格式字符串!!!否则会报错)
customInsert: function (insertImg, result, editor) {
// 图片上传并返回结果,自定义插入图片的事件(而不是编辑器自动插入图片!!!)
// insertImg 是插入图片的函数,editor 是编辑器对象,result 是服务器端返回的结果
// 举例:假如上传图片成功后,服务器端返回的是 {url:'....'} 这种格式,即可这样插入图片:
let url = Object.values(result.data) //result.data就是服务器返回的图片名字和链接
JSON.stringify(url) //在这里转成JSON格式
insertImg(url)
// result 必须是一个 JSON 格式字符串!!!否则报错
}
}
editor.create()
}
}
</script>

父组件:

1
2
3
4
5
6
7
8
9
10
11
12
13
14
15
16
17
18
19
20
21
22
<template>
<div>
<wangeditor :catchData="catchData"></wangeditor>
</div>
</template>

<script>
import wangeditor from './wangeditor'
data(){
return{
content:""
}
},
methods:{
catchData(value){
this.content=value //在这里接受子组件传过来的参数,赋值给data里的参数
}
},
components: {
wangeditor
},
</script>

修改编辑器默认高度:

1
2
3
4
//wangEditor3中默认高度为300px
.w-e-text-container{
height: 700px !important;/*!important是重点,因为原div是行内样式设置的高度300px*/
}